Navbar

Image Map

Thursday, February 27, 2014

#tbt: The Return of Grandma and Grandpa Blough


Michael and I spent Sunday afternoon going through some boxes that we have been avoiding. While doing so, we came across a little gem.  A DVD from our senior year in college. 

We were involved in a Christian ministry at Purdue called The Navigators.  The Navigators always celebrate the end of the school year with a banquet where they honor their seniors.  In 2010, it was our turn.  This is Michael’s and my section of the “senior” video.  Enjoy. 


I’m blaming it on the video quality that I sound like Fran Drescher and Michael sounds like he has a terrible lisp.  However, the words, actions, and appearances?... we own entirely!
The Purdue Grandma and Grandpa in the video were actually throwbacks from a previous Halloween costume (2008, I think).
There they are, folks, the originals!

Its funny, this picture is kind of a look at the past and a look into the future! Yikes! That's scary!...scary and awesome!
Isn't it great when you can be crazy and ridiculous with the one you love?  If not them, then who?

What old pictures and videos are you rediscovering during spring cleaning?  Do you have a favorite Halloween costume from the past?  Which would you choose - the pig or the tricycle?  
Don't miss a beat.  
{Follow this blog on Bloglovin'}
 http://www.bloglovin.com/blog/8102735/a-nurse-and-a-nerd

Sunday, February 16, 2014

Gettin' in the Mood

Bow Chicca Bow Wow! Happy Valentine's Day (weekend)!

Don't worry, the title and first line are as racy as this post is gonna get.  If that pleases you, read on.  If not, leave this blog and never return 'cause you ain't gonna get anything you're lookin for here. Weirdo!

:-) Anywho, I hope this Valentine's Day has found you spending time with someone you love whether that is your significant other, your family, or some truly wonderful friends.

Michael and I are not the biggest Valentine's Day celebrators but this year we seem to be doing a much better job.

Earlier this week I got a little bee in my bonnet and got to decorating for Valentine's Day.  I love decorating for the seasons but I usually don't do too much for minor holidays like this one, since the "season" seems so short.  But I just decided to hunt around the house and put out some love-y and sentimental things to "get in the mood". 


Normally, In the public spaces, I like to keep the pictures of Michael and I to a minimum, but our little wall in the dining room just exploded with some of Michael's and my favorite moments from our 8 years together (8=crazy!). 

I had some little hearts that I had already cut out for a future work party and I decided to put those out to reinforce the theme. I even added a couple of love notes that I had put in some frames.  


 But I didn't just limit the love to between Michael and I.  We have been trying to find a way to display things we get from other people and finally I got my card hanger out of a box from the basement and hung it up.

I also found some pink and white ribbon and I just went to town on the fireplace.


Mr. Michael surprised me with some pretty flowers and wouldn't ya know it they just fit right in too.  :-)

Michael and I spent a really casual evening at home.  I made Michael his favorite meal (beef and noodles, mashed potatoes, rolls, apple sauce, and pie) and we watched a couple of episodes of one of our new favorite show on Netflix.  Have you seen it? An Idiot Abroad.

We have never laughed so hard watching any other show! It has some language that you have to overlook, but other than that, it is great!
Update: After watching the "Brazil" episode of An Idiot Abroad, we would not recommend that episode.  Quite inappropriate and not even close to family friendly.

I also wanted to take this time to send a little love to you all! I am so glad I can connect with you through this blog!  I have found such a great support system in all of you!  I have a blast writing it and I'm glad to know it can entertain you as well.  Love you guys!

 How did you spend your Valentine's day?  Do you decorate for the season? Any Netflix shows/movies that you are lovin these days?

Don't miss a beat.  
{Follow this blog on Bloglovin'}
 http://www.bloglovin.com/blog/8102735/a-nurse-and-a-nerd

Sunday, February 9, 2014

DIY Dog Toy... For Free!


Remember my friend Beth who I went to Chicago with?  She's the same one who came to help us paint the ceilings. We became fast friends in college over our love for polka dots and Jesus (not necessarily in that order).  And since Michael and I have moved back home, Beth and I have had to make staying close friends a priority.  I think we have done a bang up job for two girls who may, at times, be a little less than stellar at returning phone calls or emails.  :-) But one advantage to loving this girl is that I know her.  I know how she feels loved and valued...or at least I'd like to think I do. 

 
Have you heard of The 5 Love Languages by Gary Chapman?  It is a super helpful way to understand yourself and your loved ones.  It basically helps to pinpoint ways people feel the most loved and ways they show love.  The 5 Love Languages are: Words of Affirmation, Acts of Service, Receiving Gifts, Quality Time, and Physical Touch.   (If you are interested in discovering your own love language here is the link for the quiz - FYI, mine is Quality Time) And my friend Beth?  Well receiving gifts communicates love to her in a way that none of the other things do.  And knowing that really helps me to be a better friend toward her! But it makes it challenging too.

I'll be honest, I've never been that great at giving gifts.  I have, what I call, gift insecurity.  You may have experienced it before too.  You want so badly to find the perfect gift to show someone that you care about them - for it to be meaningful and useful to them.  But that desire also leads you to questioning yourself every step of the way as to whether they will like it or use it or if they will *gasp* end up re-gifting it or garage sale-ing it!

On occasion, however, I do think of a knock-out-punch kind of a gift.  One that gets you excited and ready to give it the moment you think of it!
Courtesy of Beth Wilson Photography

No, I did not get her a puppy.  But she did get one recently! 

That face.  oh my! It just melts my heart.  Her name is Lily and she's a bernadoodle and I want to steal her.  But I'm a better friend than that, so I settled on the idea of giving Beth's little Lily a gift to welcome her into the family. I knew Beth would get the biggest kick out of it!

I had looked at a doggy boutique downtown but did not find anything that would ship easily or that caught my eye.  I love etsy, for its handmade goods and unique finds but was not finding anything that I could ship that would be under my budget.  Then I thought... well why don't I make something! So off to google I went and found a DIY dog toy tutorial (click for the original tutorial).
It was super easy ya'll.  If you have a sewing machine and can sew a straight stich, you can do this.
I am one of those said people! So off I went!

And guess what? Its basically free! It was for me since I had the fabric just laying around. 
Michael's boss's wife is an interior designer and has a bunch of old upholstery and fabric samples that she gets rid of when things get discontinued.  And Michael, being so very thoughtful, brings them home to me! I have a box full of them just waiting for my creaitivity to strike. So when I decided to make a doggy toy, I knew exactly what I was going to use.

Here was my step by step process:

1. Choose your Fabric: 

The nice thing about these is that they are heavier duty fabric and they come in coordinating color schemes.  I picked out four different possibilities. 

I went with #4 because of its size - there would be little waste, and because of its color - I liked the sophisticated warm earthy tones that I knew would fall in line with Beth's home decor. 

2. Prep the Fabric: 

Once I picked out my fabric I seam ripped the label off and cut it down to size.  The fabric ended up being 12in by 8in. 


 I added a sixth fabric scrap, feeling that it needed to be a bit longer - and I'm glad I did!

3. Sew each of the long sides of the scraps together: 


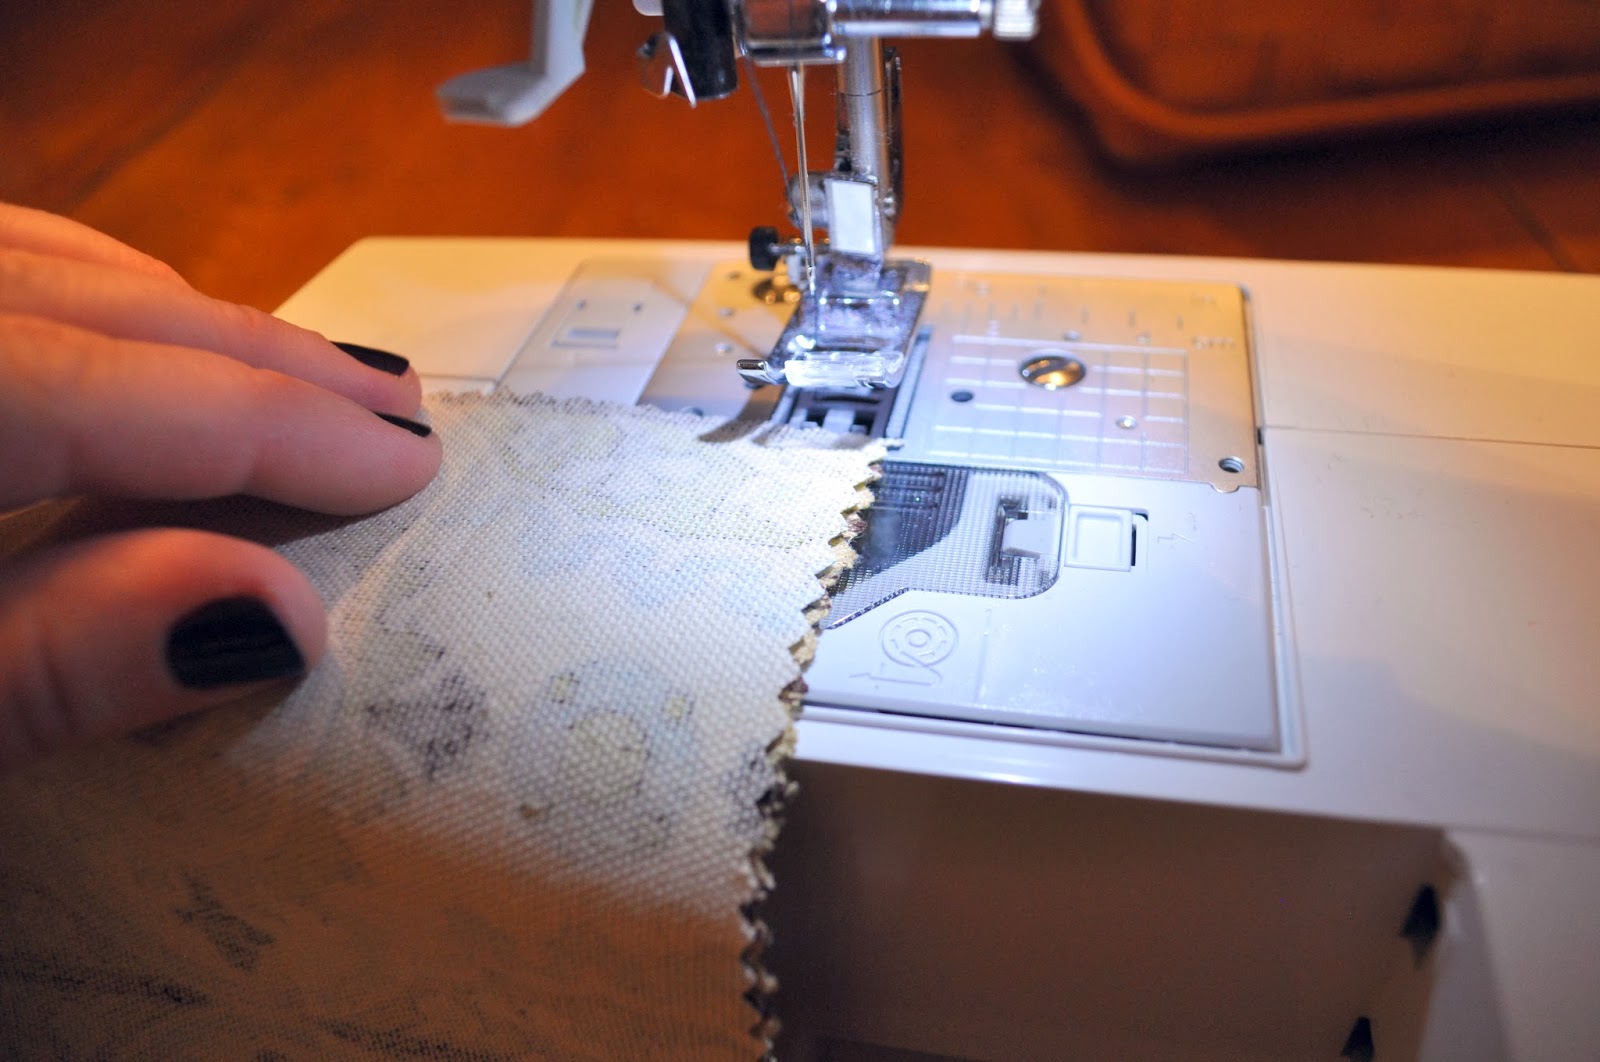
 I placed the faces toward each other and sewed a straight stitch along one side. 
 Then I moved on down the line until all the scraps were stitched together to make a long line. 

4. Iron:  

I ironed the seams I just sewed to make them lay flat. 
 Then I folded down both short ends once, and then 
  folded it over again so that I can sew it to make a hem.


5. Sew the Hems:

6. Fold the Fabric Hot Dog Style: 

fold it so that the face of the fabric is folded in. 

7. Sew the Open Long Edge: 

you end up with an open ended tube. 

8. Turn the Tube Right Side Out:

 I reached my arm through, grabbed the opposite end, and pulled it through.

9. Tie a knot in one end. 

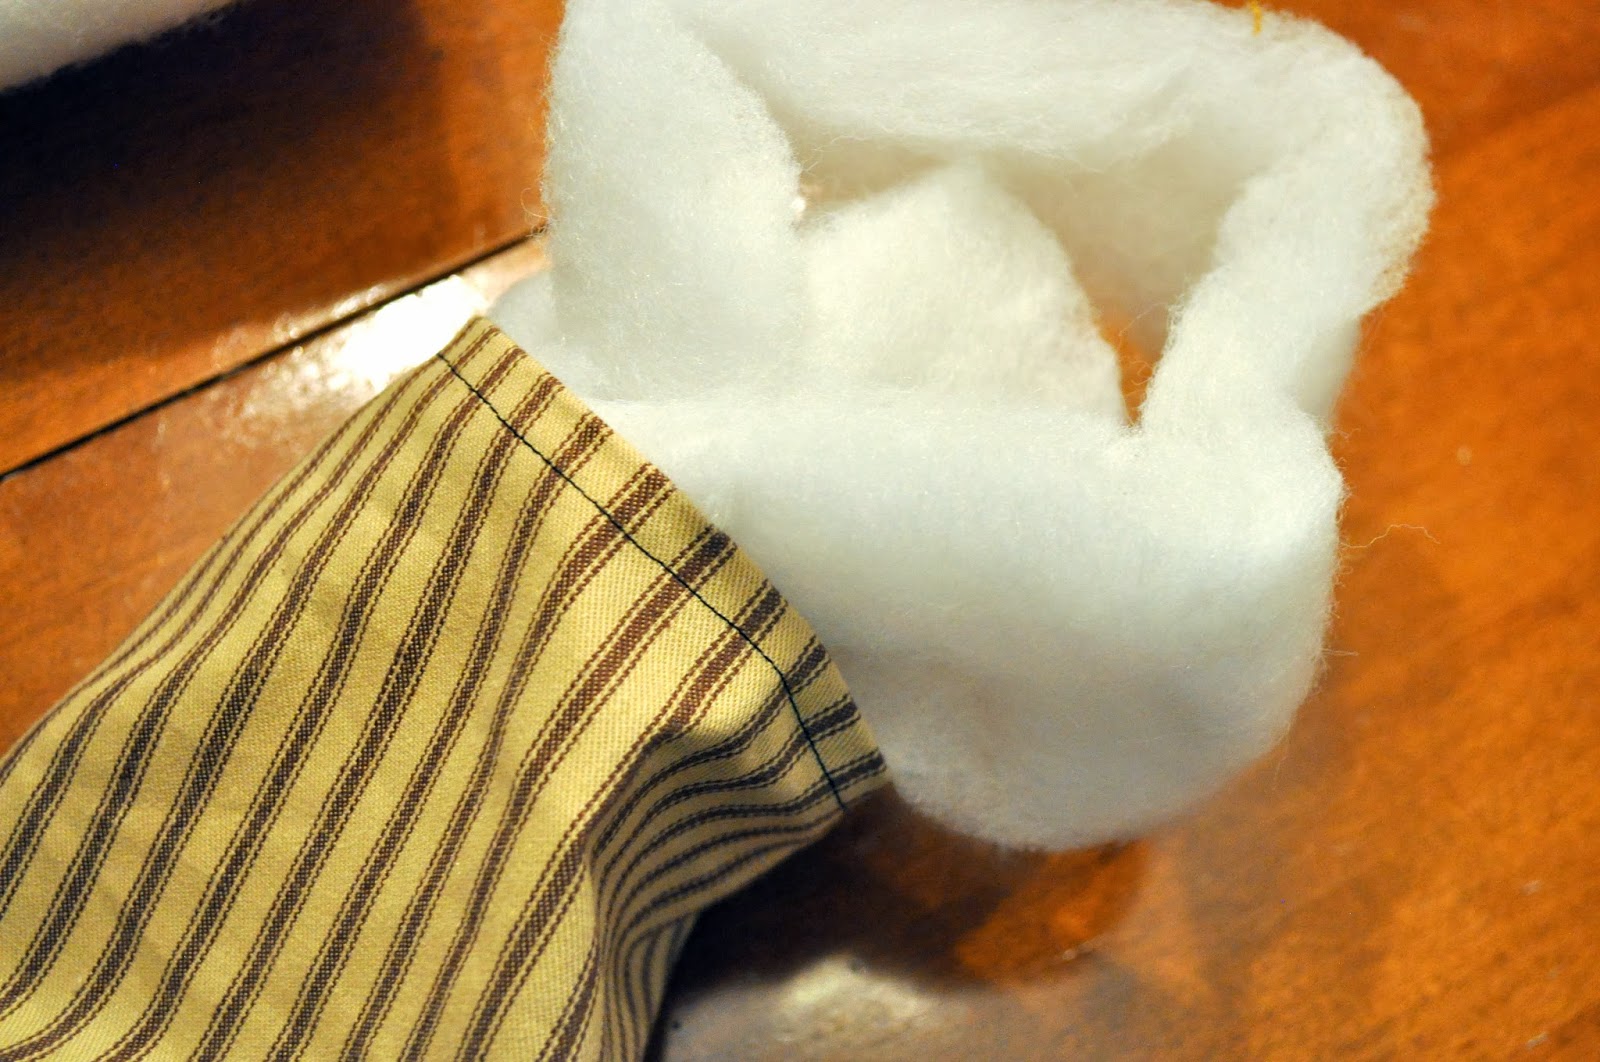
10. Ball Up Some Filling and Shove it to the End of the Knot: 

 I used stuffing but you could use anything, other fabric scraps, a tennis ball, etc.. Just be sure to tie your knots tightly against the ball.

11. Tie a Knot at the End of the Ball:

12. Repeat: until you run out of fabric.  

My goal was to make 3 balls in the toy but because my fabric was thicker, I had to settle with two.  You kind of just have to play around with the amount of fabric at the end.  I had to tie and retie things 3 times to get the right spacing. 


13.  Don't forget that its all about presentation!

 Presentation, Presentation, Presentation!
 I decided to ship it to them in the mail.  Who doesn't love to get packages in the mail?


14. Allow the Little Critter to Enjoy it! 

Even though I had already shipped the toy to her, I actually decided to drive down for a short visit to meet lil' Lily Wilson in person.  Afterall,  they are only little for so long.  So I got to see her enjoy her gift firsthand.  Warmed my heart!

Puppy Love


Have you been DIYing anything lately? What's your love language?

Don't miss a beat.  
{Follow this blog on Bloglovin'}
 http://www.bloglovin.com/blog/8102735/a-nurse-and-a-nerd

Sunday, January 26, 2014

Kitchen Details

The after pictures that I posted on the Kitchen: Before and After post were nice but they were pretty plain.  Now that we have lived here for over a month now, I felt we should update the blog with pictures of the actual "lived-in" kitchen.  Plus you can see where we added color and texture and the new counter stools.

Also, here is the wide view of the Kitchen and Dining room which I have been unable to photograph until now.

This is my happy place.  It was one of the biggest and first tasks we wanted to accomplish when we first started brainstorming what we were to do when we renovated.

This is the same view from before the renovation.
Honestly.  I almost don't even believe it! When I look at this picture, I feel like someone has wrapped their fingers around my neck and are closing off my airway.  -Slightly dramatized but yet, it conveys the spirit of how this part of the house made me feel.  Suffocated and cut off.  Now? Open and ready to party!


 Yes, there are some new additions to the kitchen since you last saw it.  The new counter stool have been working overtime since we assembled them after our trip to IKEA.


And I got these canisters for Christmas from my mother-in-law. 

 I love the antique feel they have and their copper finish ties in with our copper sink and island lights.

We have also been trying to add subtle color in other ways like through dish towels, rugs, and fruit on the island.


Overall I think things are really coming together for this lil' ol' kitchen o' mine.  I'm just gonna let her shine!


 And I thought I would end today's post with a funny story.  Would you like to hear it?


Well, whenever I preheated my oven, there came along with it a very strong propane smell.  So much so that I turned on the vent hood to help clear out the fumes.  Not only that, but it seemed like it took forever to preheat.  This went on for a couple of weeks until I said something to Saint Steve. So SS and I came over to the oven and turned the oven on and waited for the fumes to come.  They gradually got stronger and stronger and all of a sudden...

Booom!


A big fireball shot out the bottom of the oven! 


"Whoa" Said Laura.
"I don't think it is suppose to do that", said SS. :-)

So we turned the oven off and started to disassemble the inside of the oven.  The first thing we did was remove the oven liner I had placed at the bottom of the oven - you know to catch anything that might fall to the bottom of the oven.  When we removed that, there was a warning on the bottom that said, "do not cover with foil".  Oh.

Well...  I mean.. Ooops.  Yes, the fireball was, of course, my mistake because I had not seen the warning when I had placed the liner there. The liner was preventing the flow of propane, so it built up below the oven; when the oven eventually did light, Ka-boom!

So word to the wise.  Check before you cover the bottom of your oven.  :-)

Any fireballs coming from your oven? Or other house-mishaps?

Don't miss a beat.  
{Follow this blog on Bloglovin'}
 http://www.bloglovin.com/blog/8102735/a-nurse-and-a-nerd

Sunday, January 19, 2014

Ay-Yay-Yay-IKEA

Well we've done it.  We have taken our new homeowner obligatory journey to and through IKEA. I think it is a right of passage for young homeowners to take the pilgrimage to IKEA for its space-saving and money-saving items! At least it seemed that way for us!

Why IKEA?

Bang.

Bang for our buck.

That's the bottom line in our book. We would not call ourselves house poor by any means but after a 7 month renovation, any person in their right mind would be looking to save a couple of bucks.

We had several items on our radar.

1. Closet system. 

Although we could have asked St. Steve to build us a beautiful and custom closet, we felt like we just couldn't.  Time and finances made us look at other options.  We looked at Lowe's closet systems and were not too impressed.  I have heard good things about the IKEA PAX system so that was the direction we headed.  They have a very nice planning tool for the system that is fairly easy to use.
This was one of the configurations we had dreamed up for our closet - its not the one we went with, I'll show you that one on another day.

Then, for a short time we considered switching gears to the ALGOT system.
The ALGOT system came in at a cool $255 and would have been an incredible savings for us, but on that day we learned the benefits of checking things out in their showroom.  When we got there we took one look at it, we realized the quality was just not going to work for us.  There was no way it was going to hold up as a closet system. The drawers were pretty flimsy and came off the tracks. So we went back to our original plan of the PAX system.  And guess what?! It was on sale! IKEA is redesigning the PAX system and were putting the old style on clearance. So we saved about $250 on our closet! Score!

1. Living room furniture

I have always loved the look of slip covered sofas.  I love the casual homey feel that they give off.  And I love that they are super practical because you can wash them or replace them to freshen things up.

So I have been dreaming of throwing out our old college-style slip covered furniture and upgrading.

Ones I have been digging?
1. Pottery Barn
2. Ballard Designs
3. IKEA

As much as I would love to just go for it and buy me a Pottery Barn or Ballard gem, we can get a great IKEA look-a-like for about $1000 less.  Maybe some day.  Because I truly believe that quality does matter, but so does price.  And with future kiddos coming down the line who will climb, spill, jump, and waller on these babies, I just want to be conservative before I jump in and spend that kind of money.  But also, we have known a lot of people with the Ikea EKTROP sofa and they have all been very happy with how they have held up.


So we went for it.  We bought the sofa with matching love seat.  I was originally planning to buy the beige slipcover but when we got there and took a look at it we thought it was too close in color to the white slipcover chairs we were planning to get.  Michael was happy.  He had wanted the grey ones all along.  I was glad for him.  He doesn't win color battles too often.  :-)

Like I said we also planned to get two white slip cover chairs - the Jennylund EKTORP- to go along with our sofas. 

 I decided on white slipcovers because I love love love the look of white slipcovers but I did not want to take the plunge of going all white on the sofa or love seat.  I wanted a taste, but not the whole meal.  In my mind, it seemed a lot less daunting of a task to remove a slipcover from a chair to wash vs a whole sofa.  We'll see if I live to regret it.  But that is the great thing about the ikea slipcovers, it cost very little to change your mind ($39 to be specific)! Can't beat that!!

3. Bar Stools

We also needed bar stools for our kitchen island.  Ya'll, bar stools are expensive! I have been on the hunt for reasonably price barstools for months! Ever since we knew we'd need them for our counter height island.  The main places I had looked were target, pier 1, world market, joss&main, and craigslist.  I was really hoping I could find some inexpensive options I could rehab from craigslist but...no dice.  The stars never aligned where there were 3 counter height stools that were a good price and condition.  I definitely wanted to spend less that $100 a stool.  So that excluded joss&main and pier 1.  I had been very close to purchasing different stools at world market (#1) and target (#2) - Like I had my mouse hovering over the checkout button.

But I just didn't feel right about any of them.  At first I thought I wanted something industrial feeling like the one from world market.  But eventually I felt like it just didn't seem to fit with everything else - it felt a little too dirty while the rest of my kitchen was feeling so fresh and clean.  The target stools were cute but had a french country feel to them, which is fine, just not what I was looking for.  So ultimately I decided simple and classic is best - not sure why I fight this sometimes... I think more and more I am realizing this is central to my personal style. 

So I finally decided we would go with (#3) the INGOLF bar stool. At a cool $60 a stool, that easily came in under budget.  I know what you are thinking though... did we sacrifice quality for price?  And I would respond, "Not that I can see."  They are built with solid wood and feel very sturdy.  I like their petite frame and the fact that they have a shorter back that does not stick up much over the counter.  I like the white color that ties in with the perimeter cabinets.  Although, I have toyed with the idea of painting them (our kitchen could use more pops of color).  Still might.  As of right now, I am just going to live with them as is and mull over that idea for a while.

That's it!

Big big big thanks to my parents and our friend Peter (who's in med school in Chicago and met us there).  We could not have done it without them! It would have been impossible to maneuver all those carts by ourselves.  Also, a big special kudos goes out to my dad.  What a trooper.  He's not a shopper (biggest understatement ever), and I think he could have very easily lost his mind (and cool) in that crazy place.  But he didn't.  What-a-man! Thanks dad!

Yes, so I mentioned that we had a lot of carts to maneuver.  How many is a lot?  I would say 5 is a lot, wouldn't you?  We had 6.  Yikes. It was slightly embarrassing at the checkout line.  But we couldn't possibly be the only people in history to ever purchase a lot of stuff from IKEA.  A guy across from us in line smiled and said, "is this for a business?" I laughed and said, "Nope! It's all for us!" Embarrassing.  But necessary.  We really are pleased with the purchases now that they have been unloaded and assembled. 
 
We got home Sunday night about 8:30 and had everything unloaded by a little after 9pm.  We are super smart people and had planned this trip the day before we were having our small group over to our home for the first time. That meant we had to get everything assembled within the next 22hours.  So by 10pm we were looking at each other thinking, ok... hope this goes well... and fast! And it did! By midnight we had assembled the sofas, two chairs, and three bar stools.  I mean, I did have a Purdue Engineer working on this so.... I did have a bit of an advantage over the normal IKEA assembler. But overall it was pretty simple.

Obviously we did not assemble the closet system.  It will be an all day Saturday kind of project I think.  And, of course, I will update you all when we finish that! I think I will be able to post a before and after of the living room soon! Steve finished the fireplace mantel this week, I just need to slap some paint on the trim and stain the mantel.  Excited about that!

Doing any furniture buying lately? Have you guys ever dropped a wad at IKEA like we did?   

Don't miss a beat.  
{Follow this blog on Bloglovin'}
 http://www.bloglovin.com/blog/8102735/a-nurse-and-a-nerd