Navbar

Image Map

Sunday, March 30, 2014

Dining Room Details

**If anyone is here looking for an update on those peach buds Mrs Apple was talking about last week, she says we should give it another week to know for sure. So bear with us for another week of suspense.**

I'm feeling a bit like things have been in limbo lately.  Hence the series of posts that have been about other things the last couple of weeks.  But I thought I would get back to some specifics about what's going on in the house here lately.

I have been trying to work on one room at a time. It allows me to really focus on the vision of the room and what I want it to look like. It gives me the time to mull over things and avoid impulse purchases. 

Right now? It's the dining room.

So on St. Patty's day, I (unknowingly) got into the spirit of the day by painting our dining room green.  Although, I would say it is more of a soft blue green - rather than straight green.  The color is palladian blue by Benjamin Moore.  
It looks so much bluer on the paint chip.  Why does paint have to be so tricky? Because the world is a mysterious and dangerously confusing place.  That's why. Beware.


 I was hoping it would be a bit bluer than it actually is, but I am still really liking it. And of course it does read differently depending on the lighting.  Like right now I am sitting here with no lights on and just the early morning light coming through the windows (which is not very bright since it is snowing outside - again.) and it is looking a lot more blue. 

I love the way that the color makes the molding in the room pop!

I considered going without curtains in here so as not to cover up the trim (that SS worked so very hard on).  But I am glad I went for it.  It just adds so much color and softness which I believe this room needs because the kitchen can read a bit hard and monochromatic.

I bought the fabric from fabric.com on clearance and then used no-sew hem tape to make the curtains. I hung them with drapery clips from ikea. Super easy guys. I can post a tutorial if anyone is interested. The fabric is indoor/outdoor fabric. So next time spaghetti gets flung around the room and gets on the curtains I can just wipe it off easily. - or some other classy food flinging situation like that.

Next on the list for the dining room is a rug. Here are a few of the options I've been looking at (all from outdoorrugsonly.com).

Although it doesn't really look it, all these rugs are a navy and white.  I thought that these would tie in to the curtains nicely.  

#3 was eliminated right off the bat from Michael since he says it looks too much like a beach towel - so there goes that.  I am not really feeling the tight smaller stripes of #1.  So that leaves #2 which was the one I liked best anyway.  We are also choosing to go with an indoor/outdoor rug since it will be more durable and easier to clean if we get spills on it.  That's what we did with the kitchen too and have been very happy with it.


We haven't pulled the trigger yet.  I am having a hard time committing to the right size rug. So to help with that I took painters tape and measured out the rug size we were thinking:6x9. The great thing about this strategy is that we could live with the size for a while and see how it works. Ultimately we realized 6x9 was a bit small and, to scoot your chair out to leave the table, your chair would fall off the rug. Then you would have to pick up the chair to get it back on the rug and ain't nobody got time for that! So the picture below is measured out for a 8x10 rug, which looks like it will work much better. 


And finally, once we decide on the rug and get it in place, I can make a final decision about the door color.  I know for sure that it will be a shade of navy blue. 
The shade I'm looking at is called Van Deusen Blue by Benjamin Moore.

 
I think it will work well to tie in the curtains and the rug. But we will see when we get the rug in place. 

I also have plans for some artwork that I'm really excited to share with you guys and I eventually have plans to refinish the table to something like this:
painted farmhouse table

All in good time. All in good time. 

How do you develope a vision for a room? How do you avoid buyers remorse? Painting any rooms lately?

Don't miss a beat.  
{Follow this blog on Bloglovin'}
 http://www.bloglovin.com/blog/8102735/a-nurse-and-a-nerd

Sunday, March 23, 2014

Guest Blogger - Mrs. Apple - with the State of the Orchard Address

Hi everyone! I am taking a break from your regularly scheduled blog post to bring you a spring update from a local celebrity: Mrs. Apple.  As some of you know, that's my mom! She wanted to be a guest blogger for the week and use my blog as a platform to get the word out about how the apples and peaches are doing after this hard hard winter.  So take it away mama!...


They call me Mrs Apple. 


Over 5000 children and parents visit Kercher's Orchard each fall for a fun and educational field trip led by none other than me, Mrs Apple! It is my favorite time of year!! 

Who doesn’t enjoy a field trip or a weekend outing where you get to eat delicious apples fresh off the tree!!! And lets not forget about the hayrides, pumpkin pickin', corn maze, apple cider, donuts, and enter more yummy fall goodness here.

 For those of you that don’t know me, my real name is Maureen Kercher and I married Tom (fruit grower, farmer, agra businessman extraordinaire). 33 years ago I became a farmer’s wife and little did I know what that would mean for me!! 


Mr. Apple with grandson Max


We are also the parents of Laura who is this blog’s writer and “The Nurse”!  Growing up she looked like this:

Little Laura

Laura was our third and youngest child and we always said that we had her solely for our entertainment. When you read her blog, keep that in mind when you find yourself laughing!

Tom was born into a farming family and is a 4th generation fruit grower. It is a difficult job trying to battle the weather, bugs, diseases, and continually changing desires and tastes of our customers. As Tom always says, “If it were easy, everyone would be growing their own fruit.”  After what I have witnessed these last 33 years, I see no fault with that statement.

It takes a huge leap of faith to be a farmer. And for us, it takes the 4P’s : Preparing, Planting, and Pruning. The 4th and very important P is PRAYING. Nothing is a guarantee in farming. We do loads of work, hoping and praying that the current crop of apples, pumpkins, sweetcorn, squash, tomatoes, cabbage, peaches, melons and peppers make it through to harvest. Something as small as a 5 minute hail storm can take it all and leave us with nothing but bills and no way to pay those bills.  It makes us faith-filled farmers!!  We've had some partial losses through the years which have been hard.  But thankfully we have only had two complete crop losses over the years.  One in 1992 after a bad hail storm and then, more recently, in 2012 when we had some early warm weather in March followed by a hard frost.  


Which leads me to why I wanted to write this post in the first place.


It takes a whole year to grow an apple or a peach! Apple and peach buds begin to be developed on a tree in mid summer where they hang out beside the fully matured apples.  Once the apples are picked, then it's the bud's time to shine. They are dormant all fall and winter, and start to swell and open in the spring of that year. They are pollinated by honey bees in May, and the fruit grows all summer until harvest time. One whole year from start to finish! …….. It can be a very long year! 

It's probably not surprising to hear that weather during spring, summer, or even fall can affect our crops, but few realize that we can lose a whole crop of fruit in the winter from very cold temperatures. A peach or apple crop can be frozen out in January, February, or March if the temps plummet in the subzero range - which would mean we would have nothing to harvest and sell in late summer and fall.
Do you hear an "uh oh" coming?...

Apple buds are unable to withstand temperatures any lower than -20 and peach buds, -10. At these temperatures we start seeing extensive damage. This winter we had temperatures at -17 several times over January and February. So you see we have reason to believe the whole peach crop has been damaged but we are feeling confident that the apple crop is probably just fine. Phew!

But what about the peaches?!! 
 
Being the forever optimists (it takes that to be a sane farmer), we would hope that a few of the peach buds may have survived.  But we don't want to have to wait around for the blossoms to show up later this spring. (I said we were optimistic, not patient.)  So this week Tom cut and brought in some peach branches with peach buds on them and put them in a vase of water. His plan is to trick the branches into thinking that it is spring! In about a week from now the fruit buds will tell us the truth about this year’s crop or lack of crop so come on back next Sunday to find out what we've found.  Live bud or dead bud.
I hope that you have been enlightened by my ramblings!  Our farm market will be opening back up in early May.  Come and see us for flowers, morel mushrooms, and hopefully peaches!! Also, like us on facebook and visit our website for more information and updates.  
-Mrs Apple

Thanks mom! I know you will all be joining me in prayer for those peaches! I will have a pretty unhappy hubby if there aren't any homegrown peaches to be had this summer.  

Have you all had the pleasure of coming to the orchard?  What's your favorite Kercher's Orchard memory/tradition?  Any burning questions for Mrs. Apple? 

Sunday, March 16, 2014

Saving and Spending: How We Did It

Last weekend left us busy entertaining and enjoying time with some of our college friends so I was not able to get this massive post done in time for my regular Sunday evening post, but I got myself around for this Sunday...so here ya go!  :-)

I have been thinking about writing this post for a long time because it has been so central to what we have been doing for the last year.  Its all about how we spent and how we have saved during our big home renovation. 


7 Ways We SAVED:

1. Live below our means. 

This was/is huge for us as we were saving and planning for our future.  Our secret? We budget and keep track of our expenses.  I will be the first to tell you that I was not all that thrilled about budgeting when we first got married.  In fact, it was probably our biggest source of conflict our first year of marriage.  But now, I love it -OK, love is a bit strong but at least I see the value in it.  Michael and I sit down at the beginning of every month to talk about last month's expenses, how we did, and our progress in saving for our goals. It is very empowering and it allowed us to work together to reach a goal.  In this case our goal was buying and renovating a house! By living below our means, we have been able to build awesome credit scores which found us awesome interest rates.  Also we were able to save a sizable down payment allowing us to avoid private mortgage insurance as well as having to pay interest on a larger principal.


2. Ask for help from family! 

This saved us BIG BIG bucks! Not only did my uncle, who is a super talented carpenter help us out BIG time (we payed him for his expert work, of course, but he gave us the "family discount") but we also had the help of my brother-in-law with tiling our backsplash in the kitchen and the bathroom. Now, you do have to be sensitive to boundaries and feelings - you want to be able to look these family members in the eye at thanksgiving when you ask them to pass the gravy.  But having your family's help has another perk-other than money. It was really fun to make memories with them.  I think any two people trying to dodge yellow jackets on top of 18ft scaffolding becomes bonded for life.  Right Steve?! So if you have family that have skills, ask for help! The memories are guaranteed -the savings are just a bonus. 


3. Shop around. 

Having 5 months to plan a renovation before it started and having 7 months to actually do the renovation, gave us a lot of time to plan.  I recommend planning as much as possible before picking up a crowbar (even though you can't wait because the feeling of ripping a door frame out is what dreams are made of, you must resist until you have your ducks in a row! Trust me!).  For bathroom fixtures we saved over $1000 by buying them through Amazon and Lowes compared to the fancy local showroom.  (Caveat, we love buying local but we can't pass up on $1000+ savings!) And you may say, well they aren't the same quality... But they are.  Exactly the same.


4. Don't' Be Afraid to Buy Second Hand.  

I am a big big fan of the Habitat ReStore, here's the website for our county.  I scored enough tile for all of our kitchen backsplash and even some for our shower for $20 (I bought the rest from Home Depot).  I bought lights for our dining room, bedroom, office, and hallway all for $45.  And I bought the brackets that frame out the openings in our main living area for $8.  Just typing all that out gets me feeling all excited.  I love a deal! And not only that, but I love a deal that gives me a huge bang for my buck and I think those do!
 
Another way we saved second hand was through Amazon.  A lot of times you can buy "used", which is actually new, the box has just been opened.  This saved us a moderate amount - but hey, it all adds up! We even did that with our security system. We bought refurbished pieces from the company which were probably used minimally before they were returned, and we get to enjoy the savings.  Every little bit counts!


5. Have a big picture in mind.  

Because we are renovating top to bottom, we had to think long term.  Since we are going to put a porch on the front of the house, why add new gutters?  Since we are going to add on a larger garage down the line, why reside the old garage?  Since we are already rerouting the plumbing, why not just plumb the upstairs bathroom while the walls are open?  These things just made sense.  Some of them aren't pretty, but we can live with it when we have a bigger picture in our mind of what our home will be like.  And some of them cost us upfront now, but later on we can get to the fun stuff without having to fork over the money for additional work. 


 6. Use what you got

One thing we did not do a great job at was using what our house already had in it.  We stripped our house of most everything it already had: walls, insulation, plumbing, electrical, appliances, cabinets, lights, trim, doors, siding.  The list goes on.  Sidenote: Renovating this way can be very overwhelming and not for the faint of heart. You have been warned.  But we were able to find a use for some of the original things in our home.... when we scrapped them for money! Yes we scrapped things like the old siding, appliances, copper pipes, wires, etc.  "Cha Ching" to the tune of  $812!


7. Do the work yourself.  

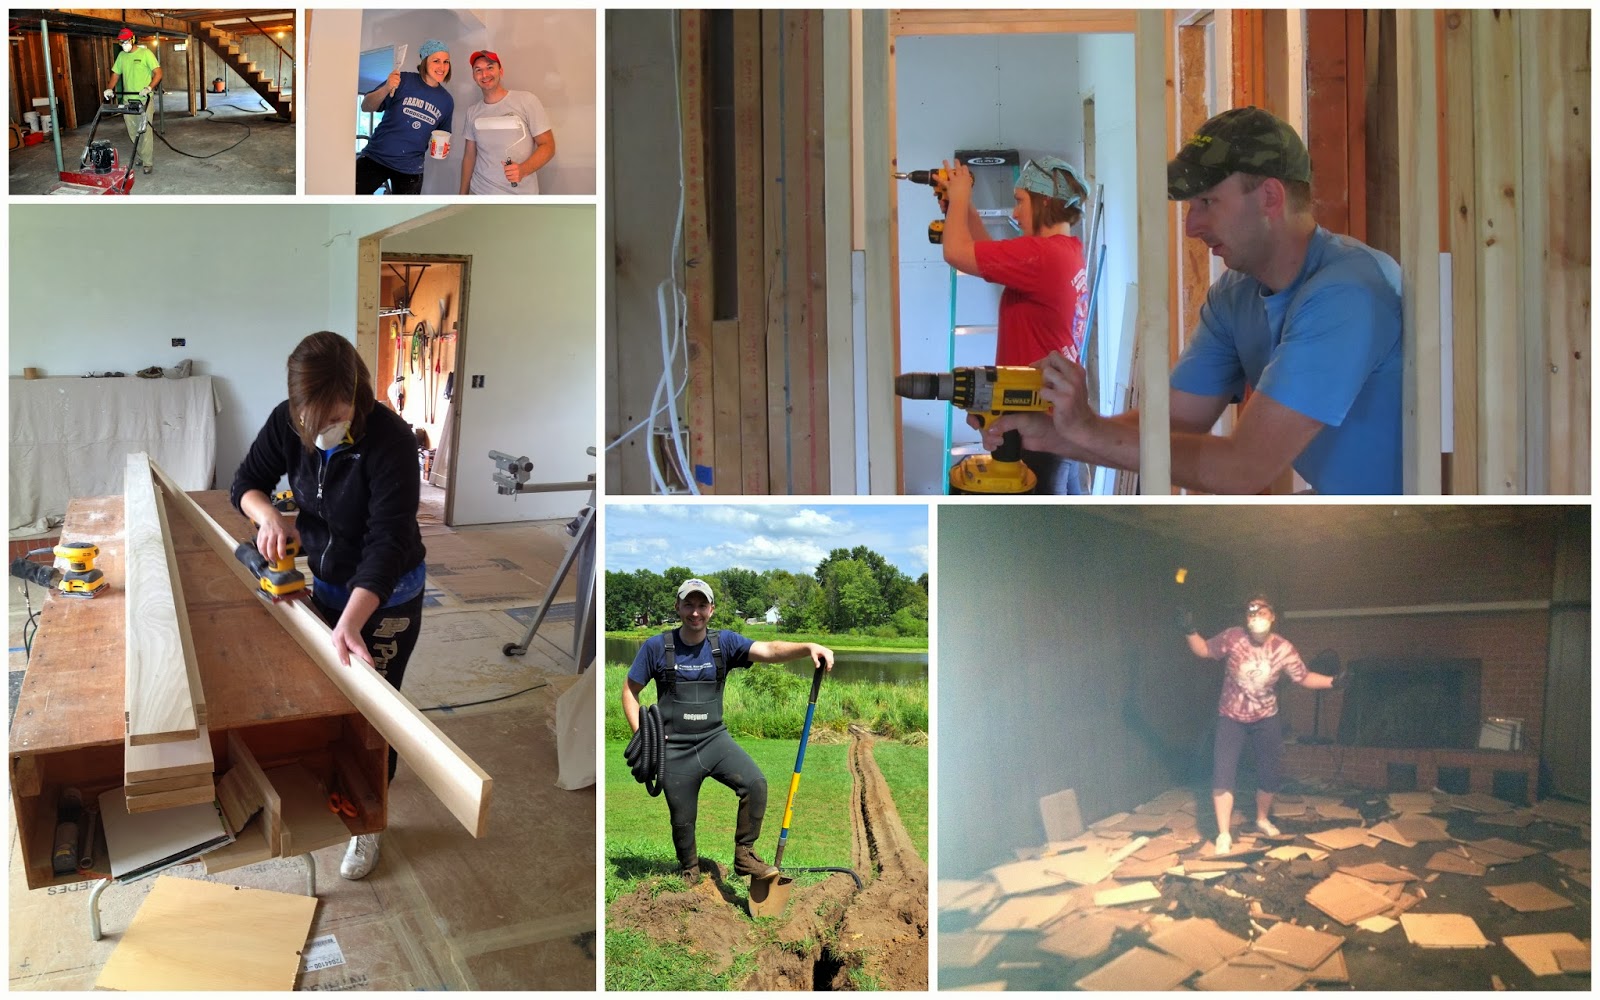
A lot of people have said to us "oh but you are doing most of the work yourselves, right?"  I just have to laugh.  Do I make it look that way on the blog?  I don't mean to! Because I certainly don't feel that way! I feel like we have had soooooooooo much help and hired a lot of that help.  But, on the flip side, we have done as much as we felt safe and capable of to take on.  We did 90% of all the demolition ourselves (which was fun! I highly recommend it!).  And there was a lot of it.  So I can't imagine how much that saved us.  I helped SS as much as I could when I had days off - installing windows, putting the housewrap on, prepping the trim.  We, along with SS and some other family, hung the drywall.  We dug trenches.  We sanded.  We primed.  We painted.  We have learned so much through that process and I would love to expand our knowledge and take on more and more as we begin the future phases of our home renovation.  
 

 3 Factors in Deciding When to Spend

It is VERY easy to spend during a home renovation.  Sometimes it may feel like all you are doing is shelling out money.  Luckily, if you are balancing it out with all the savings (see above), you may be privileged enough to be able to sleep soundly at night (or during the day for us night shifters) without worrying about your hemorrhaging bank account. 
In every renovation you should be allowed to splurge - on something.  I am pretty sure that is a written in stone somewhere.  But what is worth the splurge?  There are three factors that I think can help when making the decision.  I will use my kitchen as an example. 


1. Longevity.  

How long will you use this item?  How long will it last?  How long will it be in style?  For our kitchen cabinets, we wanted to go for something simple, timeless and with a little bit of a cottage look.  That's why we chose the white shaker cabinets with the black beadboard cabinets.  Black and white: simple and timeless.  Shaker and Beadboard: cottage.  We plan to have these cabinets for a long long time.  In the future, we realize that we may have to switch out appliances and maybe even the countertops may go someday.  But hopefully, the cabinets will stay for many years to come. That is another aspect about longevity.  How long will you be in your home?  For us, we will be here until they are checking us into the nursing home or until we are singing with the angels in heaven- whichever comes first.  So we feel a little more free to spend the money now on the things that we love and are important so that we can enjoy them for years to come - Instead of renovating with the plans of selling in the future.  If that would have been our plan I think we would have made a lot of decisions differently. 


2. Priority.  

How important is it in your daily life? If aesthetics are important, how much of a visual impact does it make?  What are you willing to give up in order to purchase this?  In the case of our kitchen, obviously the kitchen is an integral part of our life.  It is the heart of the home - especially since it is open to our living and dining room.   In order to offset the cost of our nicer kitchen cabinets, we decided to go with the more economical cabinets for the master bath.  So we sacrificed in the bathroom so we would be able to splurge in the kitchen. 


3. Love.  

Is there a statement piece that would be the perfect accent to bring the whole room together?  Is there something you keep coming back to and that you are seeing in your dreams? For me, one thing I kept coming back to was the light fixtures for the kitchen.  I loved the black and white theme of the kitchen, but it was feeling a bit monochromatic (probably because it was).  So when it came time to consider lighting, I had a lot of thinking to do.  I wanted something with personality, with color, and with a farmhouse feel.  It struck me one day - copper! So I hunted and hunted and hunted for copper fixtures for over the sink and over the island.  I found them at a local lighting store - Wabash Electric.  They were the most expensive light fixtures that we purchased, but we could do that because the other lights in our home had been thrifted from the ReStore. 

So obviously, even if you love something, see that you use it every day, and will use it for a long time, it doesn't mean that you should jump the gun and splurge. The #1 rule is the #1 thing I listed in this post: Living below your means.

Patience is key sometimes.  My mom always taught me, "Good things come to those who wait".  And if you love it enough, and its important enough, you will wait and save, and wait and save some more.  And really, isn't that when it means the most? Because in the end, its all just stuff.  What means more is the journey and the memories. 


What are your saving and spending secrets? What are you saving on?  What are you hoping to splurge on? Any regrets about past purchases or non-purchases? I'd love to hear from you!

Linked to: Frugal Crafty Home Blog Hop,
Don't miss a beat.  
{Follow this blog on Bloglovin'}
 http://www.bloglovin.com/blog/8102735/a-nurse-and-a-nerd

Sunday, March 2, 2014

Established, Free, Preparing - What 26 Feels Like

"So, do you feel 26?"  - A common question a girl might get if she just had a birthday where she turned 26.  And I am one such girl. 
 
The answer?: I guess, yes, I do feel 26.  And here are the things that 26 feels like. 
Birthday Meal at El Maguey

Established

26 is a great age. One reason I feel that way is that I am far enough past my early twenties (say 23) to feel established.  23 was a challenging age, I had just graduated, was newly married, was learning to be a real nurse.  It was quite a transition year.  But now I am three years past that, meaning, three years of experience that has gained me confidence in my new life as a non-student, wife, and nurse.  We are getting into the rhythm of our lives and we really like it!
 

Free

Feeling established in who I am in life allows me to experience a great sense of freedom.  Michael and I have really been enjoying being free.  Free to go, free to do, free to spend, free. My friend Linsday introduced me to a description for our stage of life.  We are referred to as DINKs (Dual Income, No Kids).  I love it! It is such a joy to have this time with each other to freely make decisions that will be unique to this stage of life.  So we are living it up while we can!
 
Michael making my birthday meal

Preparing

Along with enjoying our freedom, I think Michael and I are progressively in a state of preparation.  Because we only want this DINK phase to be temporary (i.e. we would love to be parents some day---Cheers all around ;-) but note: this is not an invitation to ask us when... because we don't know).  So although we want to get as much packed into this free time as we can - trips, home renovations, and other indulgences, we also see that this is a very important time for us to be preparing for our next stage in life.  Parenthood is hard (side note: it is also a very good TV show).  Correct me if you disagree - parents out there.  Michael and I want to not only enjoy this time for ourselves but to be preparing ourselves for those future littles that will come into our lives, Lord willing.  I want my faith to be central.  I want my marriage to be concrete (or cement?).  I want my body to be healthy.  I want our house to be functional.  All these things are staring at me saying, "you better look out! Everything is going to change!" 

So that is how 26 feels to me. 
 
Thanks to all who have helped to make this a great birthday! It has truely been one of the best ever! And the celebrations are not even over! I am celebrating with my family on Monday night and then have a couple other celebrations with some good good friends.  I have felt so much love. You are some good people. 
  
And I do want to apologize that I have not posted any more before and after pictures of the house lately.  We are in limbo right now in a lot of rooms and I am kind of holding off.  But just to keep things interesting, Here is a picture of the dining room with the new curtains! Thanks to all those that chimed in with opinions about the patterned curtains! I love the bold pattern and I'm excited to start painting!


What has been your favorite age?  Do you have your own words to describe your stage of life?

Don't miss a beat.  
{Follow this blog on Bloglovin'}
 http://www.bloglovin.com/blog/8102735/a-nurse-and-a-nerd

Thursday, February 27, 2014

#tbt: The Return of Grandma and Grandpa Blough


Michael and I spent Sunday afternoon going through some boxes that we have been avoiding. While doing so, we came across a little gem.  A DVD from our senior year in college. 

We were involved in a Christian ministry at Purdue called The Navigators.  The Navigators always celebrate the end of the school year with a banquet where they honor their seniors.  In 2010, it was our turn.  This is Michael’s and my section of the “senior” video.  Enjoy. 


I’m blaming it on the video quality that I sound like Fran Drescher and Michael sounds like he has a terrible lisp.  However, the words, actions, and appearances?... we own entirely!
The Purdue Grandma and Grandpa in the video were actually throwbacks from a previous Halloween costume (2008, I think).
There they are, folks, the originals!

Its funny, this picture is kind of a look at the past and a look into the future! Yikes! That's scary!...scary and awesome!
Isn't it great when you can be crazy and ridiculous with the one you love?  If not them, then who?

What old pictures and videos are you rediscovering during spring cleaning?  Do you have a favorite Halloween costume from the past?  Which would you choose - the pig or the tricycle?  
Don't miss a beat.  
{Follow this blog on Bloglovin'}
 http://www.bloglovin.com/blog/8102735/a-nurse-and-a-nerd

Sunday, February 16, 2014

Gettin' in the Mood

Bow Chicca Bow Wow! Happy Valentine's Day (weekend)!

Don't worry, the title and first line are as racy as this post is gonna get.  If that pleases you, read on.  If not, leave this blog and never return 'cause you ain't gonna get anything you're lookin for here. Weirdo!

:-) Anywho, I hope this Valentine's Day has found you spending time with someone you love whether that is your significant other, your family, or some truly wonderful friends.

Michael and I are not the biggest Valentine's Day celebrators but this year we seem to be doing a much better job.

Earlier this week I got a little bee in my bonnet and got to decorating for Valentine's Day.  I love decorating for the seasons but I usually don't do too much for minor holidays like this one, since the "season" seems so short.  But I just decided to hunt around the house and put out some love-y and sentimental things to "get in the mood". 


Normally, In the public spaces, I like to keep the pictures of Michael and I to a minimum, but our little wall in the dining room just exploded with some of Michael's and my favorite moments from our 8 years together (8=crazy!). 

I had some little hearts that I had already cut out for a future work party and I decided to put those out to reinforce the theme. I even added a couple of love notes that I had put in some frames.  


 But I didn't just limit the love to between Michael and I.  We have been trying to find a way to display things we get from other people and finally I got my card hanger out of a box from the basement and hung it up.

I also found some pink and white ribbon and I just went to town on the fireplace.


Mr. Michael surprised me with some pretty flowers and wouldn't ya know it they just fit right in too.  :-)

Michael and I spent a really casual evening at home.  I made Michael his favorite meal (beef and noodles, mashed potatoes, rolls, apple sauce, and pie) and we watched a couple of episodes of one of our new favorite show on Netflix.  Have you seen it? An Idiot Abroad.

We have never laughed so hard watching any other show! It has some language that you have to overlook, but other than that, it is great!
Update: After watching the "Brazil" episode of An Idiot Abroad, we would not recommend that episode.  Quite inappropriate and not even close to family friendly.

I also wanted to take this time to send a little love to you all! I am so glad I can connect with you through this blog!  I have found such a great support system in all of you!  I have a blast writing it and I'm glad to know it can entertain you as well.  Love you guys!

 How did you spend your Valentine's day?  Do you decorate for the season? Any Netflix shows/movies that you are lovin these days?

Don't miss a beat.  
{Follow this blog on Bloglovin'}
 http://www.bloglovin.com/blog/8102735/a-nurse-and-a-nerd

Sunday, February 9, 2014

DIY Dog Toy... For Free!


Remember my friend Beth who I went to Chicago with?  She's the same one who came to help us paint the ceilings. We became fast friends in college over our love for polka dots and Jesus (not necessarily in that order).  And since Michael and I have moved back home, Beth and I have had to make staying close friends a priority.  I think we have done a bang up job for two girls who may, at times, be a little less than stellar at returning phone calls or emails.  :-) But one advantage to loving this girl is that I know her.  I know how she feels loved and valued...or at least I'd like to think I do. 

 
Have you heard of The 5 Love Languages by Gary Chapman?  It is a super helpful way to understand yourself and your loved ones.  It basically helps to pinpoint ways people feel the most loved and ways they show love.  The 5 Love Languages are: Words of Affirmation, Acts of Service, Receiving Gifts, Quality Time, and Physical Touch.   (If you are interested in discovering your own love language here is the link for the quiz - FYI, mine is Quality Time) And my friend Beth?  Well receiving gifts communicates love to her in a way that none of the other things do.  And knowing that really helps me to be a better friend toward her! But it makes it challenging too.

I'll be honest, I've never been that great at giving gifts.  I have, what I call, gift insecurity.  You may have experienced it before too.  You want so badly to find the perfect gift to show someone that you care about them - for it to be meaningful and useful to them.  But that desire also leads you to questioning yourself every step of the way as to whether they will like it or use it or if they will *gasp* end up re-gifting it or garage sale-ing it!

On occasion, however, I do think of a knock-out-punch kind of a gift.  One that gets you excited and ready to give it the moment you think of it!
Courtesy of Beth Wilson Photography

No, I did not get her a puppy.  But she did get one recently! 

That face.  oh my! It just melts my heart.  Her name is Lily and she's a bernadoodle and I want to steal her.  But I'm a better friend than that, so I settled on the idea of giving Beth's little Lily a gift to welcome her into the family. I knew Beth would get the biggest kick out of it!

I had looked at a doggy boutique downtown but did not find anything that would ship easily or that caught my eye.  I love etsy, for its handmade goods and unique finds but was not finding anything that I could ship that would be under my budget.  Then I thought... well why don't I make something! So off to google I went and found a DIY dog toy tutorial (click for the original tutorial).
It was super easy ya'll.  If you have a sewing machine and can sew a straight stich, you can do this.
I am one of those said people! So off I went!

And guess what? Its basically free! It was for me since I had the fabric just laying around. 
Michael's boss's wife is an interior designer and has a bunch of old upholstery and fabric samples that she gets rid of when things get discontinued.  And Michael, being so very thoughtful, brings them home to me! I have a box full of them just waiting for my creaitivity to strike. So when I decided to make a doggy toy, I knew exactly what I was going to use.

Here was my step by step process:

1. Choose your Fabric: 

The nice thing about these is that they are heavier duty fabric and they come in coordinating color schemes.  I picked out four different possibilities. 

I went with #4 because of its size - there would be little waste, and because of its color - I liked the sophisticated warm earthy tones that I knew would fall in line with Beth's home decor. 

2. Prep the Fabric: 

Once I picked out my fabric I seam ripped the label off and cut it down to size.  The fabric ended up being 12in by 8in. 


 I added a sixth fabric scrap, feeling that it needed to be a bit longer - and I'm glad I did!

3. Sew each of the long sides of the scraps together: 


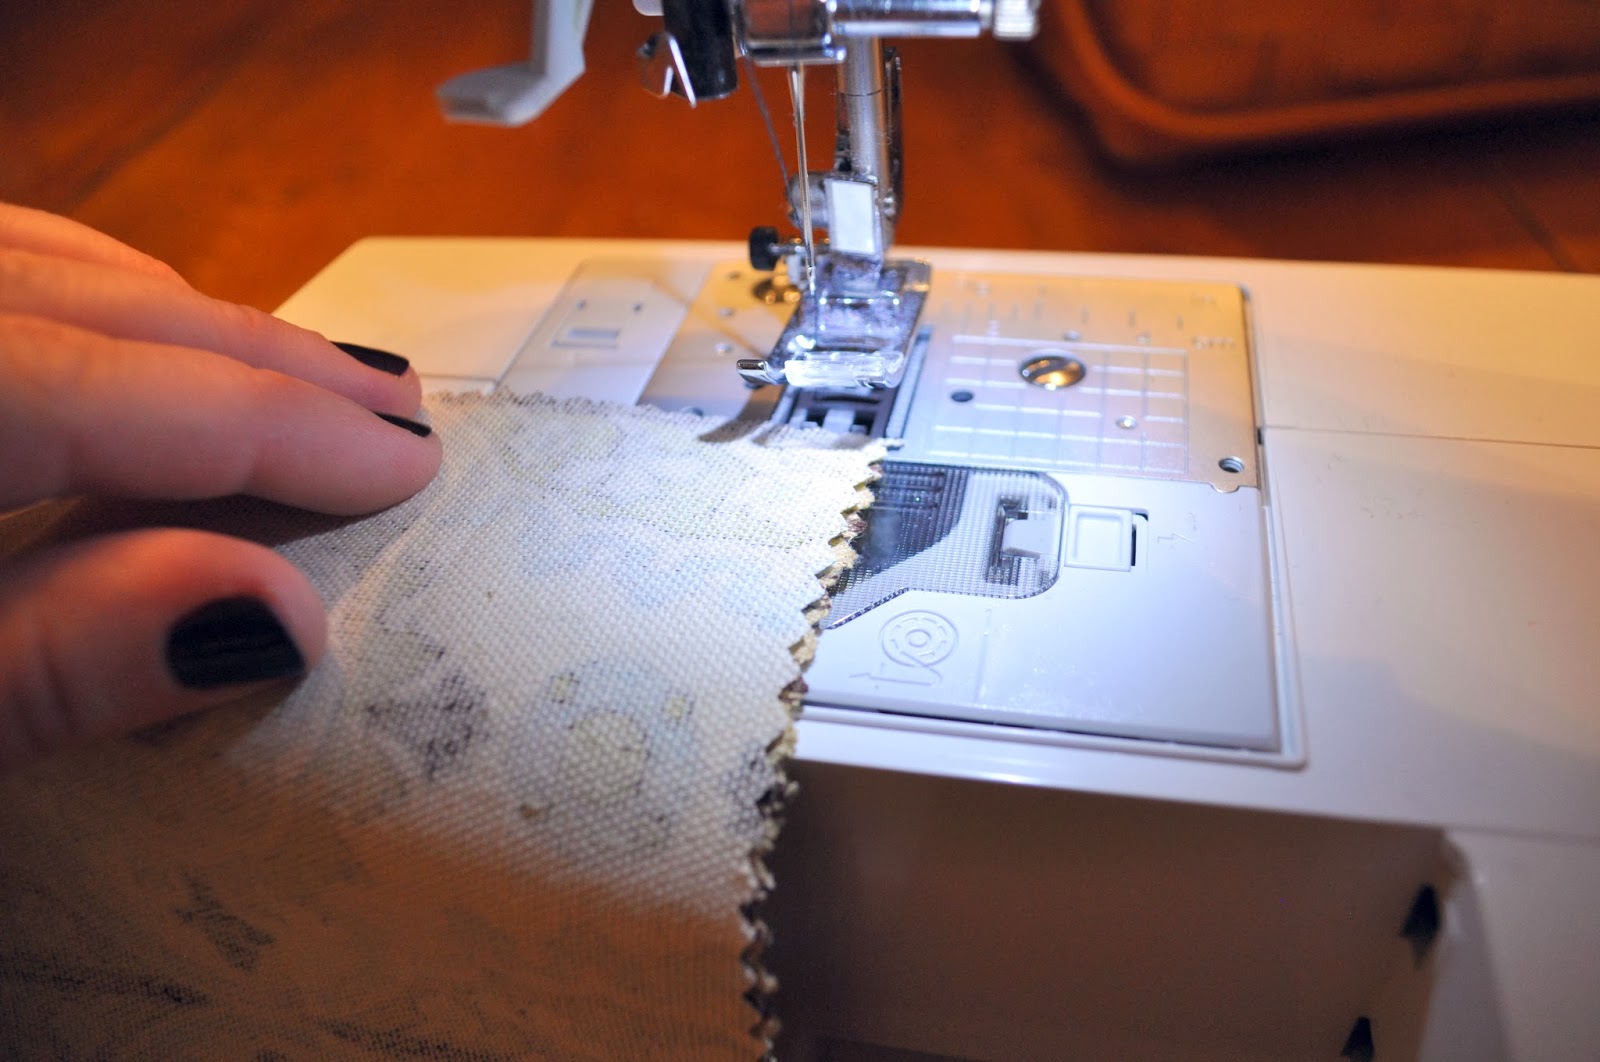
 I placed the faces toward each other and sewed a straight stitch along one side. 
 Then I moved on down the line until all the scraps were stitched together to make a long line. 

4. Iron:  

I ironed the seams I just sewed to make them lay flat. 
 Then I folded down both short ends once, and then 
  folded it over again so that I can sew it to make a hem.


5. Sew the Hems:

6. Fold the Fabric Hot Dog Style: 

fold it so that the face of the fabric is folded in. 

7. Sew the Open Long Edge: 

you end up with an open ended tube. 

8. Turn the Tube Right Side Out:

 I reached my arm through, grabbed the opposite end, and pulled it through.

9. Tie a knot in one end. 

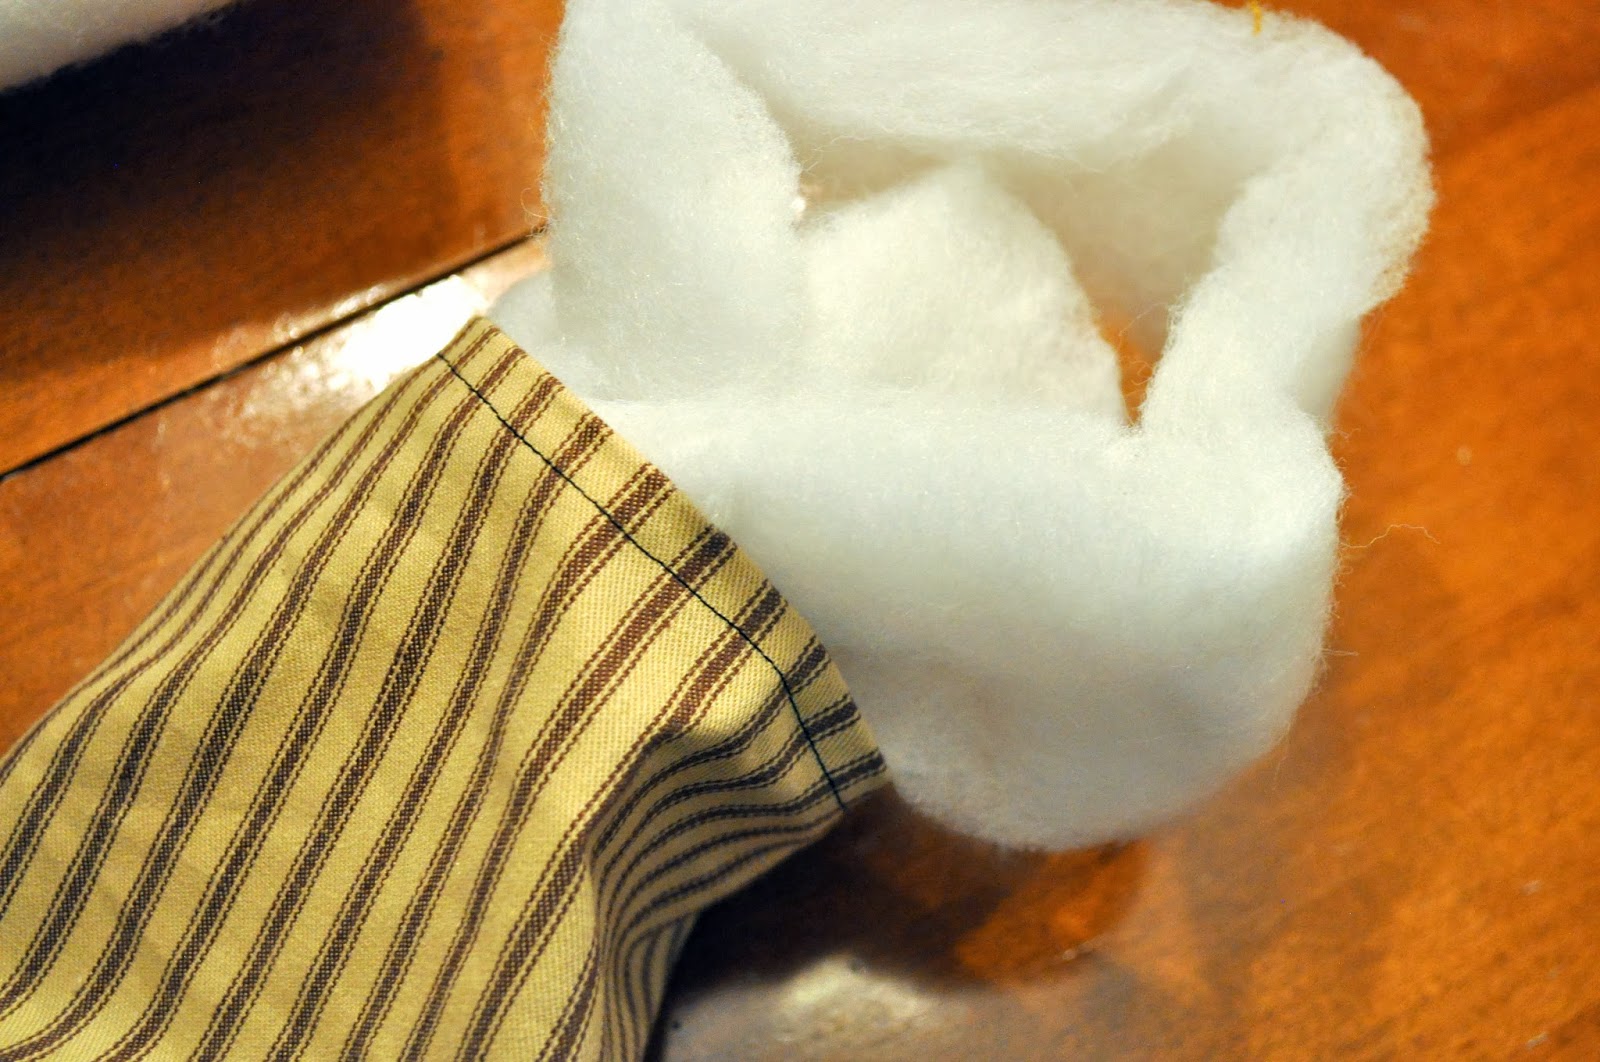
10. Ball Up Some Filling and Shove it to the End of the Knot: 

 I used stuffing but you could use anything, other fabric scraps, a tennis ball, etc.. Just be sure to tie your knots tightly against the ball.

11. Tie a Knot at the End of the Ball:

12. Repeat: until you run out of fabric.  

My goal was to make 3 balls in the toy but because my fabric was thicker, I had to settle with two.  You kind of just have to play around with the amount of fabric at the end.  I had to tie and retie things 3 times to get the right spacing. 


13.  Don't forget that its all about presentation!

 Presentation, Presentation, Presentation!
 I decided to ship it to them in the mail.  Who doesn't love to get packages in the mail?


14. Allow the Little Critter to Enjoy it! 

Even though I had already shipped the toy to her, I actually decided to drive down for a short visit to meet lil' Lily Wilson in person.  Afterall,  they are only little for so long.  So I got to see her enjoy her gift firsthand.  Warmed my heart!

Puppy Love


Have you been DIYing anything lately? What's your love language?

Don't miss a beat.  
{Follow this blog on Bloglovin'}
 http://www.bloglovin.com/blog/8102735/a-nurse-and-a-nerd