Navbar

Image Map
Showing posts with label Thrifting. Show all posts

Sunday, January 25, 2015

DIY Deadline: Custom Jewelry Trays

There's a deadline looming in our house.  One that will change everything. 

I'm a girl who works best if I have a deadline.  Now there are some out there that may label me a procrastinator.... but, I just choose to say I work well under pressure.  So now that we are past the half way point in this pregnancy, it seems like we need to get down to business and get things done.

There are tons of things I'd like to get done before the baby gets here: the nursery, painting our closet, some outdoor projects, deep cleaning, etc... but one thing I'd like to get done is to finish up some of these looming DIY projects that I have sitting around waiting to be tackled.  So, from time to time, I will be bringing you a post called DIY Deadline where I show you one of these projects that has been sitting around waiting to be completed. 
DIY Custom Jewelry Tray

This time... It's all about these jewelry organizers I have been wanting to make.

Last March, Michael and I were at the Habitat ReStore and I saw a huge stack of shallow drawers.  As soon as I saw them, I knew instantly what I wanted to do with them.  I knew we could make them into jewelry organizers.

So we bought four of them, with the idea that they would fit seamlessly into our IKEA closet system that we had just purchased and assembled.

And then they sat in our basement for 9 long months, waiting for us to get to them.

One of the biggest issues was how we were going to transform them from empty drawers into organized jewelry trays. 

Then this Christmas we decided to invest in a beautiful and magical piece of equipment called a miter saw.  Once this wonderful machine entered our home, the answer was clear. We'll cut some scrap wood and glue them down to create dividers.

So working on this project became a nice excuse for Michael to play with his new toy. 


Here is the before...(The bottom one was an old bamboo kitchen drawer organizer that we used in our old apartment kitchen drawers, but no longer need in our new kitchen. The top were the shallow drawers that we got from the ReStore) 

 ...and here are the new jewelry trays...


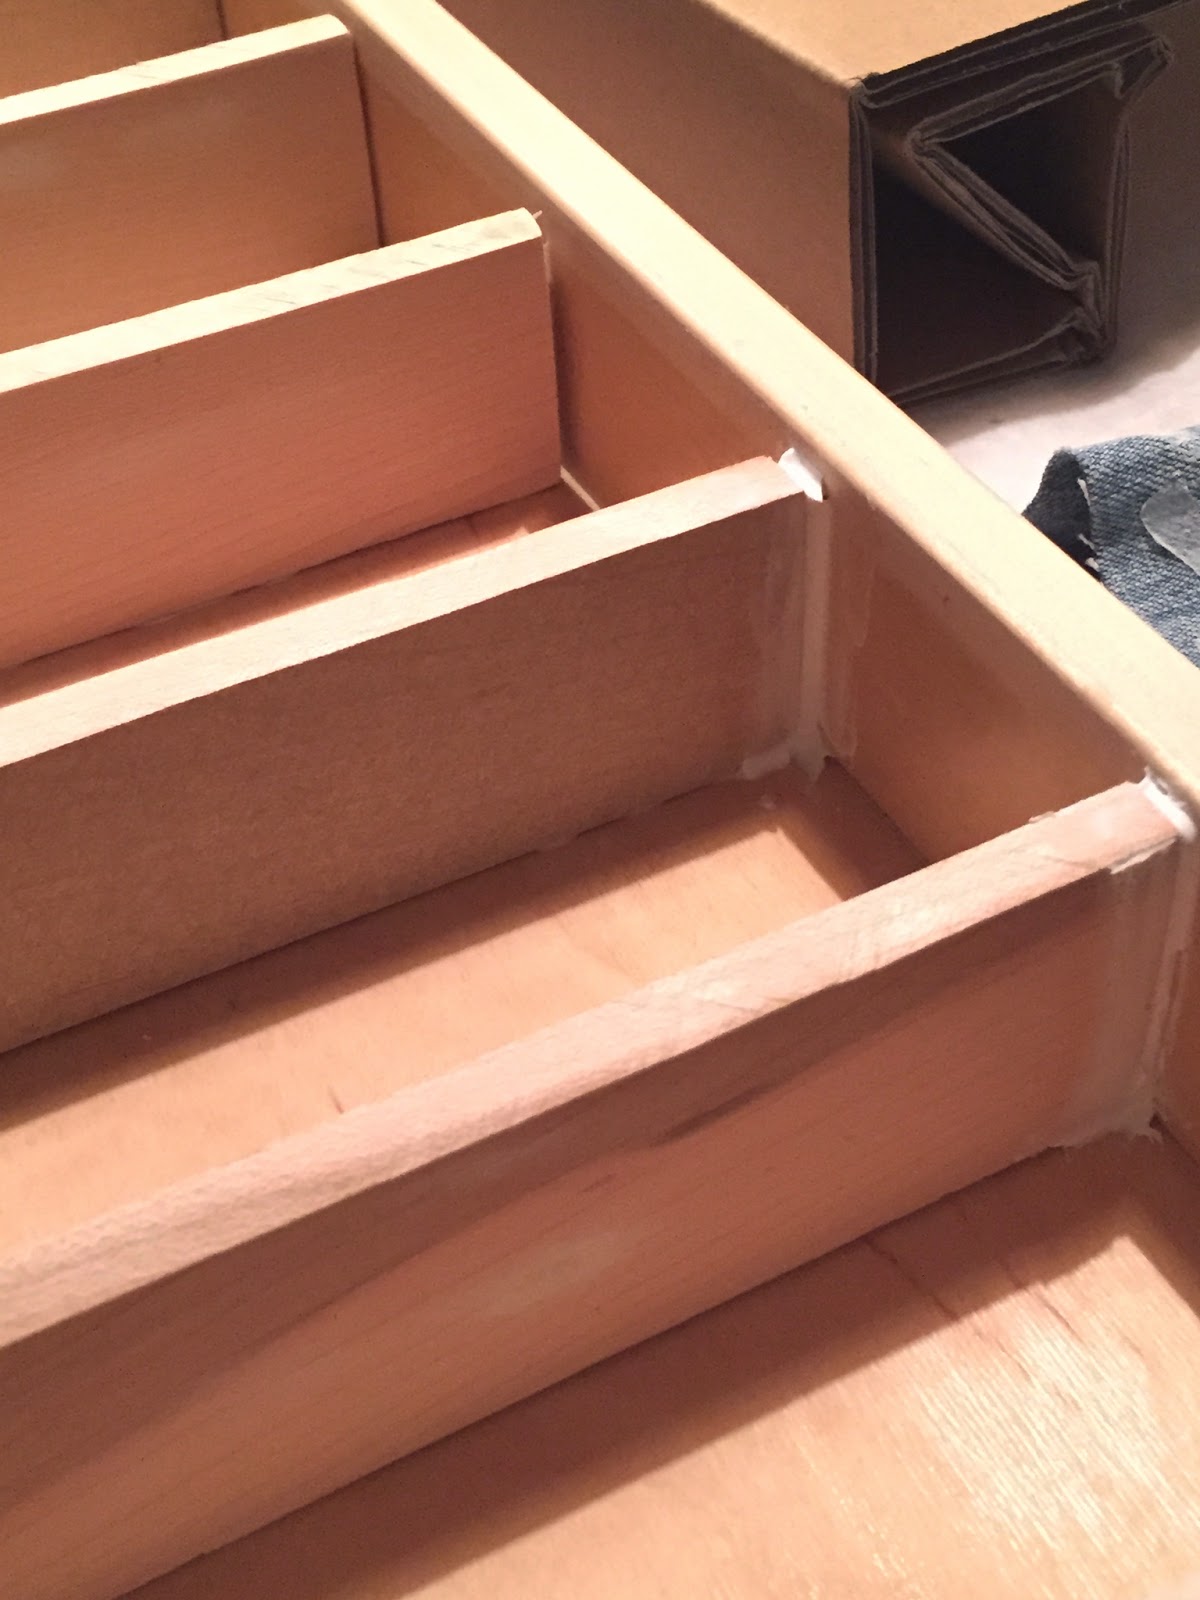
To do this, Michael sanded and cut some wood trim that he found at the ReStore to make the dividers and then glued them down with liquid nails. Some of the gaps were a bit large so we just used some caulk to fill them in. 

Then I painted them.   ....three times... that was fun. 

I mixed up some chalk paint using this recipe, that way I didn't have to sand or prime them. 

And here we are!
DIY Custom Jewelry Tray


DIY Custom Jewelry Tray

Each drawer cost us $2 since we bought them on a 50% off day. The tray separators were made from wood trim we also picked up at the ReStore for around $6 total.  So for all 5 custom drawer jewelry trays, we spent $14!

Looking online, you can spend anywhere between $10-25 a tray.  So I'm thinking we saved about $40 some bucks by making them ourselves.

DIY Custom Jewelry Tray, IKEA PAX system

 And I love how they fit in my closet. 
DIY Custom Jewelry Tray, IKEA PAX system
I put felt pads on the bottom of them and just slide them out when I want a piece further back in the tray.  I love them!

One Project down.... lots more to go!

linked to: On Display Thursday, Week's End, Thrifty Decor Chic -Before & After Party
Don't miss a beat.  
{Follow this blog on Bloglovin'}
 http://www.bloglovin.com/blog/8102735/a-nurse-and-a-nerd 

-or-

{Follow this blog via Email}

Enter your email address:


Delivered by FeedBurner


Sunday, September 21, 2014

The Time I Bought a Teepee...

If you follow me on instagram, you may have seen that last weekend Michael and I met up with some friends at an auction.

Michael LOVEs auctions.  It's a sport to him.  He gets a thrill out of the competition of it all.

I'm more like "eh".  If I like something, I like to know what the price is, decide if I want to own it, buy it and be done.

But what I DO love is hanging out with friends and getting smoking deals for things.  And this auction had all of that.

I swear, every time we turned around we saw somebody else we knew! It was awesome!

Anywho, would you like to see what we brought home with us?...

The title wasn't lyin', we bought a teepee!!


Super cool, huh?!
You might be thinking, "why?!" And my answer, of course, would be.. "Why not?!"

I totally fell in love with it as soon as I saw it! And we almost missed out on the bid, but our friend Scott saved the day! He knew we wanted it and we weren't anywhere to be seen, so he bid on it for us.  $15!! I don't want to jump the gun in saying that it's the best $15 I ever spent but, isn't it?

We can see it in the corner of a kids room someday or in a playroom.  But before all that happens down the road, we just thought it would be a quirky item that our niece and nephew would have fun with now. 

I would have been happy to call the day a success at the teepee - It was absolutely the buy of the day - but we scored even more good stuff that day.

Three Sawhorses for $7.  We could always use more sawhorses. 

And also..

This little side table for $25.  Isn't she sweet?  I really like the interesting lines and the rope like legs.  Kind of nautical feeling which I'm always a fan of! I have plans to give this little gal a coat of paint.  Maybe navy!

We also bought this coffee table! Check out the drawers! I love that it has storage!!  Although, I'll admit, it does need a little work.  It's pretty scratched up and that bottom scroll-y piece is coming off for sure.  But other than that I think it is a really great piece!  I love the scale of it in the room.  I think it's much better compared to what we had before.  I am thinking about refinishing it similar to how I refinished my dining room table - stained top, green antiqued paint on the bottom.  But I'm open to other suggestions if you guys have some ideas!

So that's the gist of what we got at the auction! But more than that we got to hang out with a couple of our friends from small group, some other church friends, work friends, and some other friends we haven't seen in years! It was a Saturday well spent!

But ma recent deals haven't stopped there! The other day I stopped by my favorite local thrift shop called Home Again and found this little number.

 So cute and I love anything caned!  See the fun texture in the picture below? I love it!  I can't remember exactly what I paid for it but I don't think it was much over $20. 

I also have been waiting for these guys to go on sale at Kohls (online it says they are currently unavailable but they had quite a few in stock in the store). 
And it just so happened to work out that we got a 30% off coupon in the mail a week or so ago.  Double score! So we got these storage ottomans for about $50 bucks each... and knowing that you can easily spend more than $100 on one makes this girl feel pretty fantastic!
 
 I love a collected home, one that grows over time.  I'm all about finding furniture that come with stories.  Yes, stories and teepees! :-)

Don't miss a beat.  
{Follow this blog on Bloglovin'}
 http://www.bloglovin.com/blog/8102735/a-nurse-and-a-nerd 

-or-

{Follow this blog via Email}


Enter your email address:


Delivered by FeedBurner


Saturday, June 14, 2014

Decorating Above the Cabinets

Hi there friends.

So last week I told you we had dug some Adirondack chairs out of my mother-in-law's garage.  Well there were some other gems that we found under all that dust.


Check out these blue green mason jars!  As soon as I saw them, I knew what I was going to do with them! I thought they would be perfectly suited for the nook above my cabinets!  Lets talk about that little nook, shall we?  I think it can be a bit tricky to decorate...

So as great as it is having space to decorate above my kitchen cabinets... I have space above my cabinets that I have to decorate.  Meaning, what the heck am I going to put up there!?

It was easy when we moved in, it was Christmas time!
Boom. Christmas Garland. Done. Easy.

And then, after Christmas was over, I moved these little copper guys up there.  
Would you ever guess that those things are Copper Snowflake Christmas Tree Toppers? Well they are!  (And they are actually still for sale here if you are interested.) For a while they were hanging out on either side of our dining room window.  Remember?

 (Whoah! Look how bare the dining room looks!)

So then after Christmas, they found their way above the cabinets. And then I turned around and it was the end of May already, and they were still up there!  I know you might not guess that they are a Christmas ornaments, necessarily, but I knew that they were and it just bothered me.  I mean, I'm as excited for Christmas as the next person (possibly more excited), but it's important to enjoy each season as it comes, don'cha think?

So when I got these pretty blue-green mason jars, I knew just where they were headed.

Up top!

Yes, I felt that I should give summer it's own time above the cabinets.

Mason jars sure do say summer, don't they?
  And I love the way the light shines through them.  

Wanna know a secret?

I needed to prop the jars on top of something so that you would see them above the crown molding of the cabinets.   Guess what I used?

You better believe it.  Putting those old nursing school textbooks to good use!

Notice they are not engineering textbooks. hm....

I'm sure that doesn't mean anything.


What's that you say? More pictures of the kitchen? OK, sure....
  hello pretty peonies..


 And I'm celebrating because I haven't killed off my basil plant....yet!

I think there are lots of other possibilities for above the cabinet decorating. Here are a few ideas I've been thinking about:

  • I love the idea of anything glass because it allows the light to shine through - glass plates or platters would be gorgeous.  Or maybe a collection of varying sizes and shades of antique vases or pitchers. 
  • A loose weave basket would bring in some nice texture- might be a good option for those who don't have lights above your cabinets. 
  • Or maybe something with a nice shine to it - copper tea kettles would be adorable.
  • Any type of garland, of course.  And its super easy to switch out seasonally.
  • If you're not a garland girl, during Christmas time, you could have a glass bowl full of antique glass ornaments, or -like me- pretty tree toppers (and supposedly you can keep them up there until May, which is nice.)
  • For fall you could get some varying sizes of pretty artificial pumpkins (Hobby Lobby usually has a ton of different kinds), or find some bittersweet and arrange them using floral Styrofoam to keep them in place.
  • Or maybe you would leave it bare for a completely open and simple look - I really like the simple and uncluttered look. Unfortunately, for my particular space (since my kitchen is black and white) it needs some color/texture/shine to keep things interesting. 

What are your ideas for above the cabinet decorating?  Don't you just love pretty additions that take minimal effort and time? What summer decorating have you been doing?

                                                            
P.S. I hope today finds you well and enjoying your dads/grandpas/husbands/dad figures.  Dad's are great! And I don't think they get enough credit for the work they do and the impact they have on the world.  So thanks to you dads! Keep providing, fixing, hugging, loving, and leading.  We need you and we appreciate you! 
Happy Father's Day!
                                                            

P.S.S. if you are wondering what color the Adirondack chairs are going to be, you'll have to wait until I finish them! Sorry! Gotta keep the suspense alive until the full reveal!

Don't miss a beat.  
{Follow this blog on Bloglovin'}
 http://www.bloglovin.com/blog/8102735/a-nurse-and-a-nerd 

-or-

{Follow this blog via Email}
Enter your email address:


Delivered by FeedBurner
That DIY Party link party at diyshowoff.com
Also linked to: Woods of Bell Trees, Merry Monday Linky Party, Frugal Crafty Home Blog Hop,
Oak and Oats: Weeks End,  Motivational Monday Linky Party,

Sunday, June 8, 2014

Gettin' Rid of the Ugly

A couple weeks back, it was Memorial Day.  The day that we remember those brave men and women who have sacrificed so much for our freedom.  And how do many of us celebrate it?  By spending time in our yards, beautifying the American Dreams that those American heroes allow us the freedom to own. 

So, I guess, in the spirit of that, Michael and I found ourselves feeling the urge to do just that. I have talked a little bit about the sad state of our landscaping - the fact that there really is none.  And when I say that, I usually follow it up with the fact that we don't plan to do any hardcore landscaping anytime soon.  The main reason is that we plan to build a porch on the front of our house, Lord willing, next spring.  So what would be the purpose of spending time, energy, and money planting hostas, crab apples, and boxwoods?  None, no purpose whatsoever.

So our task? Get rid of the ugly for just a little bit of money.

We had already replaced the original wrought iron railings and painted them white, but that is about where it ends for the frontal upgrades.  Things were looking pretty drab around here (other than our pretty siding! We love you, never change.)

(Eek) So we finally got to the point where we felt that something, even if its temporary, needed to be done. 

But what?

I wasn't really sure, so I called the experts for some advice.


These people, they know how to landscape, but more importantly, they know how to grow stuff... successfully... for a living.  I don't know two people more qualified to give us newbies some advice.

Their recommendation? Because everything we are planting is for this year only:  Keep it simple.  Easy.  And inexpensive.

I love that kind of advice!!

So the first thing we decided to do was dig out the existing grass and weeds.

With some shovels and some muscle, we got it done.  And the only picture throughout that process that I got was of me and a little baby turtle that I found.  Cute little guy.

Me?...Not so cute.

Then we laid out the flower bed design with medium-sized fieldstone that we have been collecting and that my dad has been collecting for us from the field across the creek. Thanks Dad!

We had removed an inch or so of top soil in the areas we planned to plant flowers so that we could add some fertilized planting soil.  We spread that around and mixed it in with the existing dirt.  We also spread Preen around to ward off any weeds from growing back.
 We added some small river rocks in the middle area and then laid out our plants. 
We got our plants from a cute little local place just around the corner - Kercher's Orchard.  Do you know it?-good people, great quality, and fantastic prices ;-) (also wonderful family).  We got red geraniums and white allysums - going for a simple red, white, and blue (house) theme.


 Rocks and mulch were from Menards (the mulch was out of stock but they let us place an order at the Memorial Day sale price).  I really like the set up they have there.  They have a display so you can see exactly what you are ordering and compare them, side-by-side, to other products.

Now, the only problem was, what was going to go in the large empty middle area?

 I had been looking on Craigslist for an outdoor bench.  We had just missed out on a L.L.Bean teak bench for $80 and I was a bit bummed (not necessarily a steal of a deal but certainly a better price than something we would find brand new).  So when we were at Menards, we looked around at their outdoor furniture area - hoping to find an inexpensive option.

That's when a little yellow Adirondack chair caught my eye, the price? $40.  Well how cute would that be?! So I plopped myself right down, making myself quite comfortable, and started to imagine how cute two of these would  look once we got them in the truck and in front of our home.  I looked up at Michael, already decided in my heart they were coming home with us, and said "Look! What do you think?!"

"Yeah, those would work...    -pause-    well...."

Heart sinking... great here it comes.

"Actually, I think my mom has some Adirondack chairs in her garage that she has had stored in there for years and doesn't want."

"Let's call her right now." I responded without missing a beat. 

And next thing I know we are headed over there to pick them up!

You know how the saying goes, "When God closes a Craigslist transaction, he opens a garage door with lots of stuff your mother-in-law doesn't want." Or something like that.


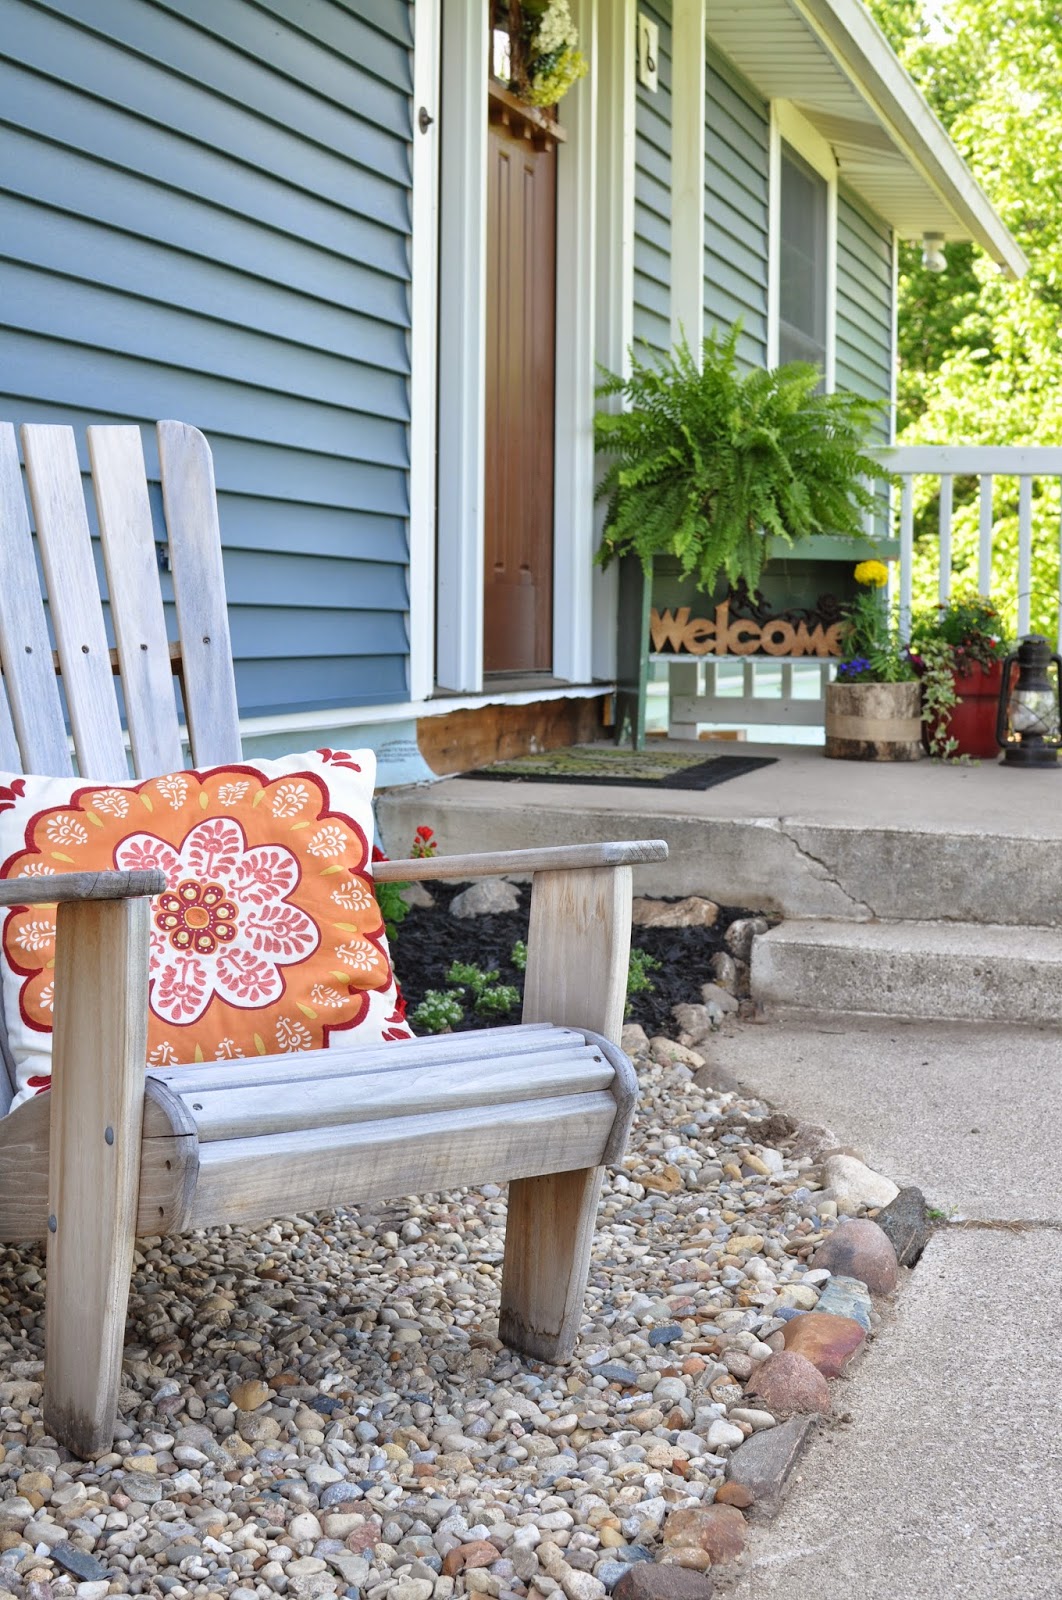
So we set the chairs in place.

Now it is two weeks later and it wouldn't be a plant/landscaping job of mine if something didn't die.  Yes, we've already had some casualties (just a couple allysums that got a little too dry, apparently).

 And bless my mother's heart, she tried to tell me it was the weather.  But I know the truth - God thought it would be a funny joke to give a black-thumbed daughter to a farmer and his wife.  He's got a weird sense of humor that way.  Stinker.

Anyway, I will press on, despite my disability.

I added some planters to do a little more sprucing (again from Kercher's Orchard).
 And Michael hung the flag in front of our home. 
Funny story about the flag.  I was planting the plants by the front walk while Michael was working on hanging the flag.  Then all of a sudden I hear the Star Spangled Banner playing.  I look up and Michael is getting ready to place the flag in the bracket and, like a true boy scout, I guess he thought he should honor the raising of the flag with the appropriate ceremonial tunes.


Its fun to be married to somebody fun.....as well as patriotic. :-)

And now, we get to enjoy our newly spruced up space. 


Who wouldn't want to sit there sipping on some strawberry iced lemonade, perusing a good book, and enjoying the wonderful view?

 
So for a little over $100 bucks, I'd say we got ourselves a pretty sweet upgrade!

Now, for those of you faithful ones,who made it to the end of this post, I have a task for you..

Actually, its more of a favor.  The Adirondack chairs are untreated wood and need to be either stained or painted in order to be able to resist the elements.  But which one?  I truly cannot decide.  So I thought it would be fun to get your opinion on this one. Should they be  Stained Wood, Red, or yellow? You can place your votes in the comments section.

Thanks for your help friends! You're just the gosh darn best!

That DIY Party link party at diyshowoff.com
A Harvest of Blessing
CarrieThisHome.com
{Follow this blog on Bloglovin'}
 http://www.bloglovin.com/blog/8102735/a-nurse-and-a-nerd 

-or-

{Follow this blog via Email}
Enter your email address:


Delivered by FeedBurner